Basically it's super easy in UE4 compared to UE3 where you need to create inventory, weapons classes, projectiles - it was little bit complicated.
Importing Hands from Shooter Example.
Copy content from Epic Shooter Example to your project. If you don't know how please read older posts.
Hands mesh is located here: SkeletalMesh'/Game/Characters/HeroFPP/HeroFPP.HeroFPP'
Hands animation blueprint is located here: AnimBlueprint'/Game/Characters/HeroFPP/HeroFPP_AnimationBlueprint.HeroFPP_AnimationBlueprint'
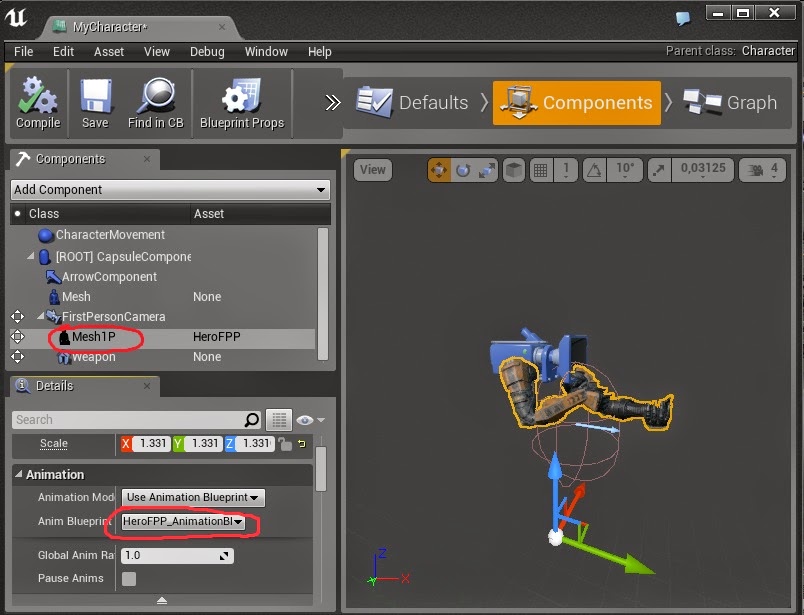
Open MyCharacter blueprint (which is your player Pawn - or Character if we are using UE4 names) you will see that there are some hands already. Let's replace them.
1. Select current hands in MyCharacter and change mesh to hands from Shooter Example,
2. Go to blueprint defaults and change animation blueprint to animation bp from Shooter Example,

After compiling you will get errors from Animation Blueprint. Navigate to it and delete blocks which are causing errors. Epic were using some variables which we don't have.
If you want to use new hands in mobile you should prepare new material with Base Color and Normal only. Material from PC won't work on Mobile.
Take your time and place hand meshes from camera as you like. Mine looks like that.
Adding first Weapon
First weapon that we will add will be Reaper from DLNK. This time we won't be adding decals and effects - will do that later. As I said first we need functionality. I recommend assets from DLNK - they are cheap with great quality!

1. Add WeaponType Enum. Basically we want to support couple of weapons so we should create functionality for that.
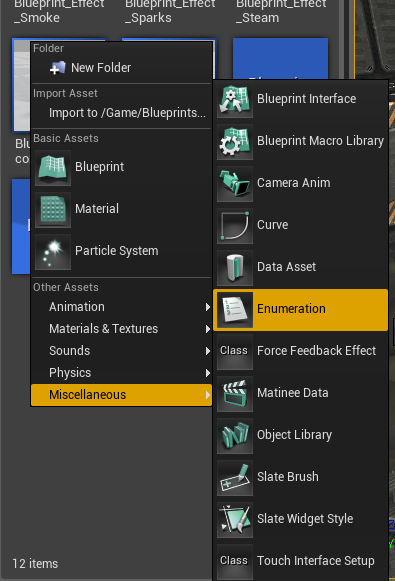

This Enum will have all of our weapon types that we want to implement. For now just add one variable to it - Reaper.
2. Go to Hands Mesh and open it.
2. Go to Hands Mesh and open it.
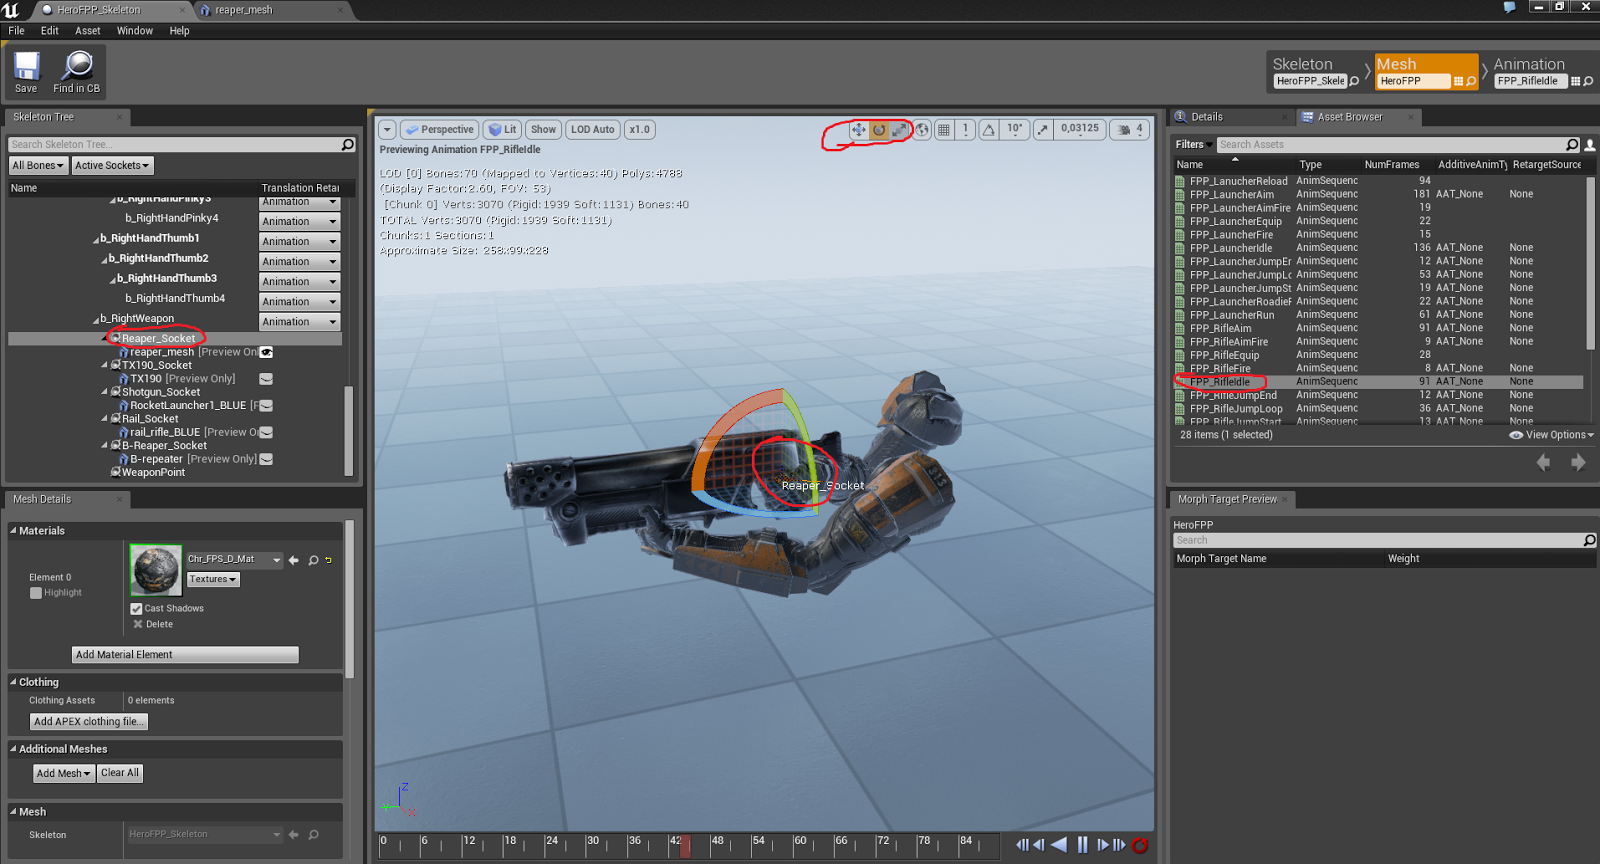
3. Find bone b_RightWeapon and create socket - name it Reaper_Socket.
4. Open Reaper package in Unity and import all of the fbxes and textures. You should know how to do that after importing Sci-Fi Scene.
5. Open imported Reaper_Mesh and change it build scale to 0.5,
5. Open imported Reaper_Mesh and change it build scale to 0.5,
6. Create material for your Reaper_Mesh,
7. Open Hands Mesh again and add preview mesh to created socket.
8. Click on FPP_RifleIdle anim and move your socket to get the best results.
You are done here. Now let's move into MyCharacter blueprint and setup our mesh.
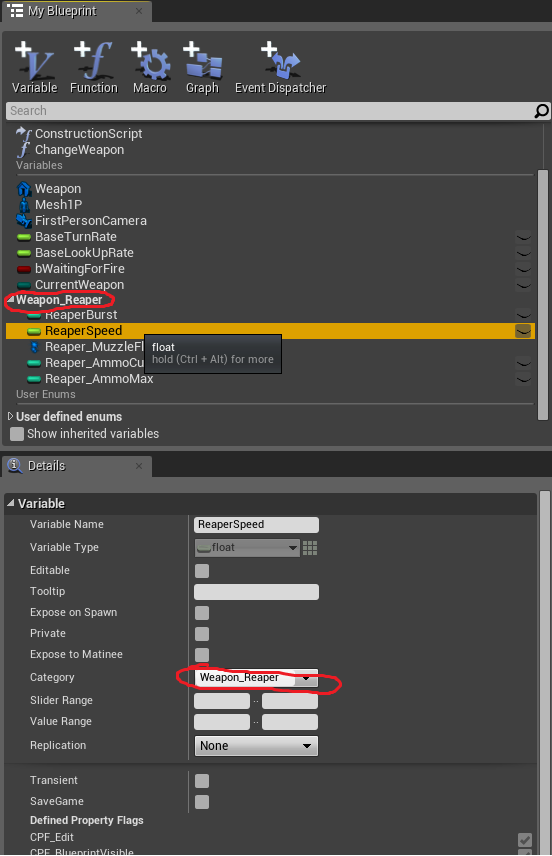
1. Create couple of variables:
Weapon - type: static mesh
1. Create couple of variables:
Weapon - type: static mesh
CurrentWeapon - type: Enum with Weapon Types that we created earlier
bWaitingForFire - type: bool
ReaperBurst - type: int default 4
ReaperBurst - type: int default 4
ReaperSpeed - type: float default 0.2
Reaper_MuzzleFlash - type Particle System
Reaper_AmmoCurrent - type: int
Reaper_AmmoMax - type: int
You can use category to variables that are connected to Reaper.
2. Create Change Weapon function. Add WeaponType param to inputs.
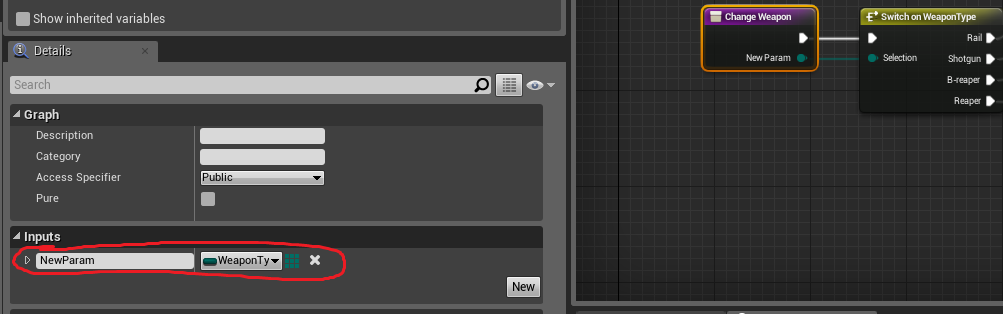
3. Swtich on WeaponType input. I've couple of more weapons now you should get only one Enum there.
4. Set Static Mesh of a Weapon Variable then Attach To Reaper_Socket and update Current Weapon variable.
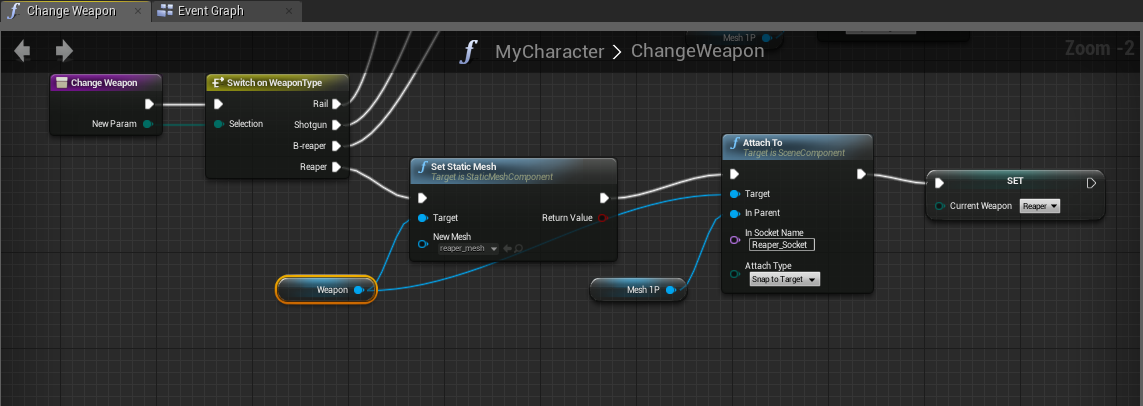
4. Set Static Mesh of a Weapon Variable then Attach To Reaper_Socket and update Current Weapon variable.
What this basically do is assigning Reaper_Mesh (the gun mesh) to our Weapon static mesh variable. After that we are attaching it to the socket that we have created in Hands mesh so it will move where the socket is.
5. Go to Event Graph and use your Change Weapon Function in Begin Play.

You should be getting your mesh visible in game right now.
Begin Play is something like PostBeginPlay() in UE3. It means that this event will fire up after Actor will be spawned. So when MyCharacter will spawn in game world this event will pop.
You should be getting your mesh visible in game right now.
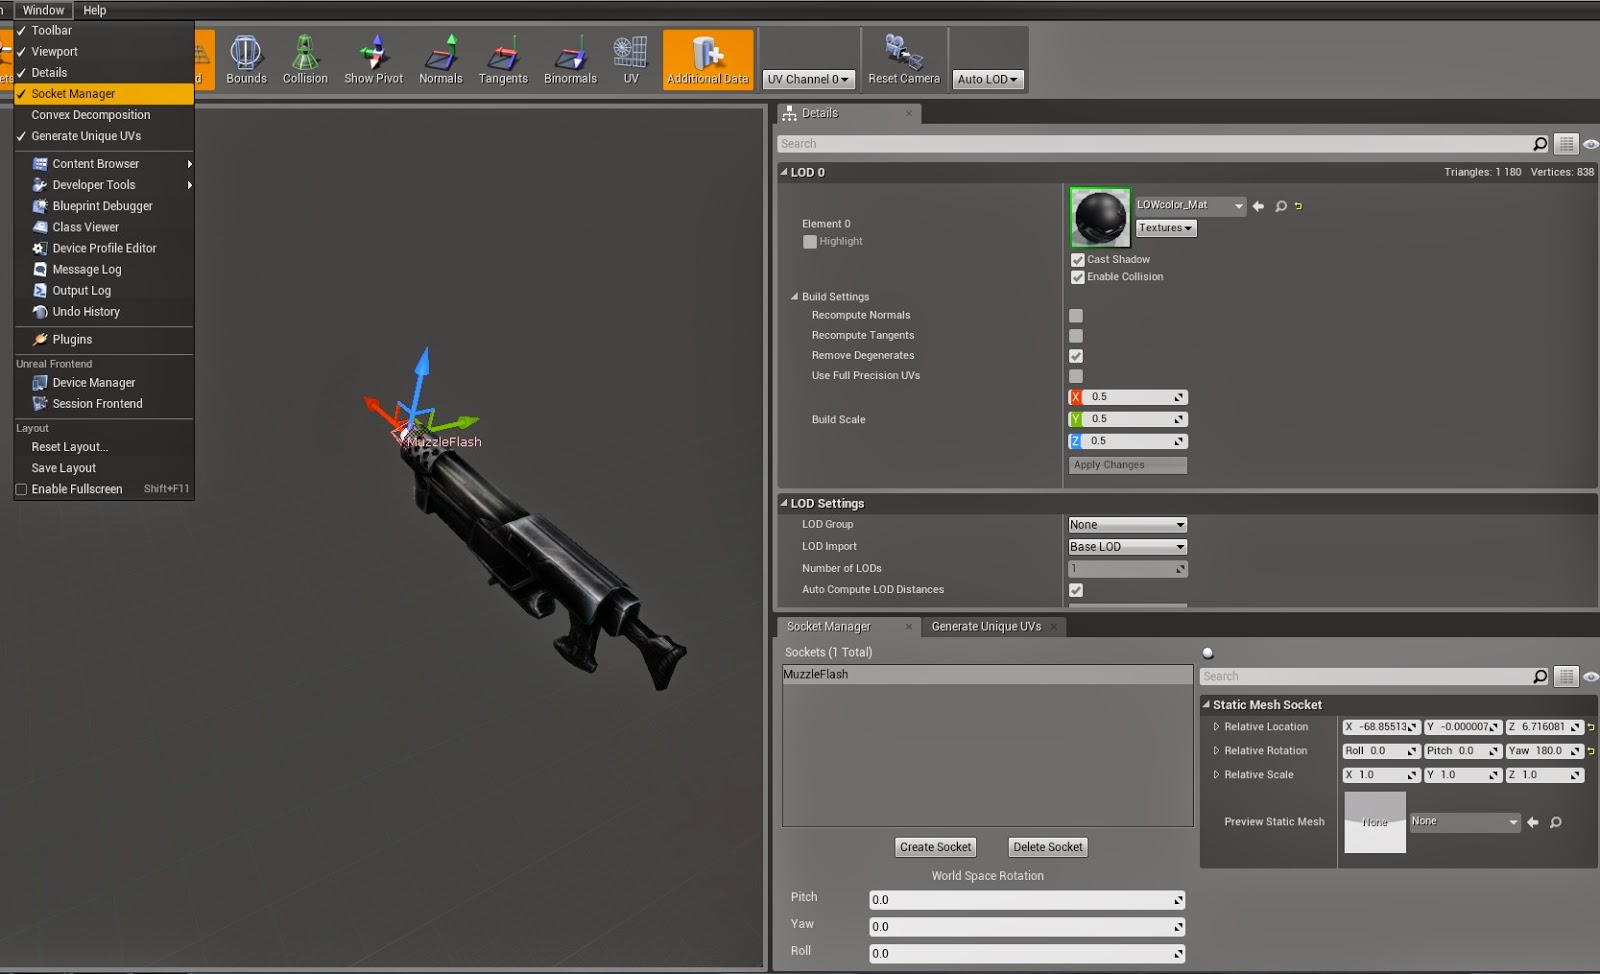
Now let's move into shooting part. Open your Reaper_Mesh and create socket. Name it MuzzleFlash and try to have X pointing right forward the gun.
 Here is entire blueprint for that. MyCharacter spawning projectiles:

I will try to explain a little bit.
1. We are checking if we can fire. Branch for Waiting For Fire bool,
2. Switch to Weapon Type and if we are using Reaper let's go further,
3. Set Waiting For Fire to true so we won't be able to spam shooting,
4. Do N block - this is really handy block. This means that we are doing something N times - this will be used for our burst mechanics,
5. Compare the counter. If it's smaller than Reaper Burst variable let's shoot,
6. If not let's stop animating and reset DO N block,
7. Montage Play - play a animation from Hands I used HeroFPP_RifleFire montage,
8. We are spawning MyProjectile in MuzzleFlash socket location that we have created in Reaper_Mesh earlier,
9. Playing some sounds,
10. Delay is used to create burst effect - you can change Reaper Speed (which we will be upgrading in the game) to make the burst faster.
That's it for shooting part. Last thing is to change MyProjectile.
1. Open MyProjectile,
That's it for shooting part. Last thing is to change MyProjectile.
1. Open MyProjectile,
2. Add new variable CharacterReference which Type will be MyCharacter. Thanks to that we will be able to get MuzzleFlash socket location to spawn other effects,
3. Mark Expose on Spawn for this variable,
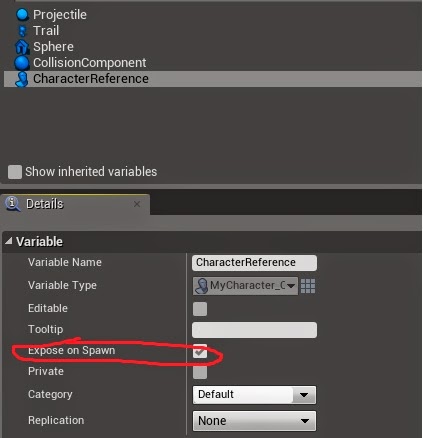 NOTE: In MyCharacter blueprint when we spawn Projectile there is CharacterReference variable that we should put SELF into it,
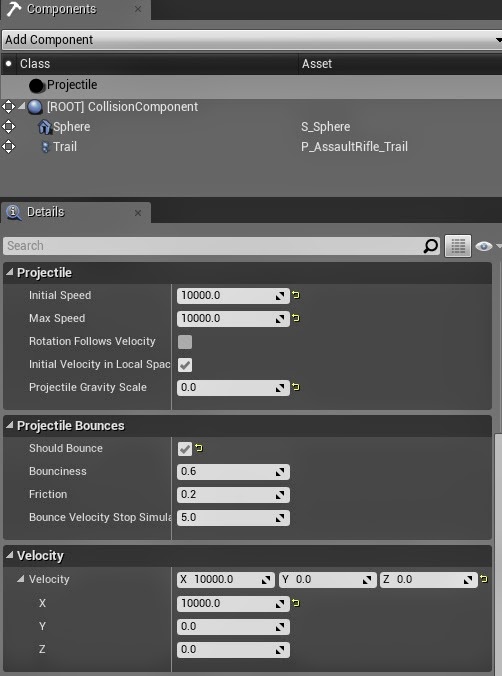
4. Add Particle System component to Components of MyProjectile assing Template to P_AssoultRifle_Trail name it Trail,
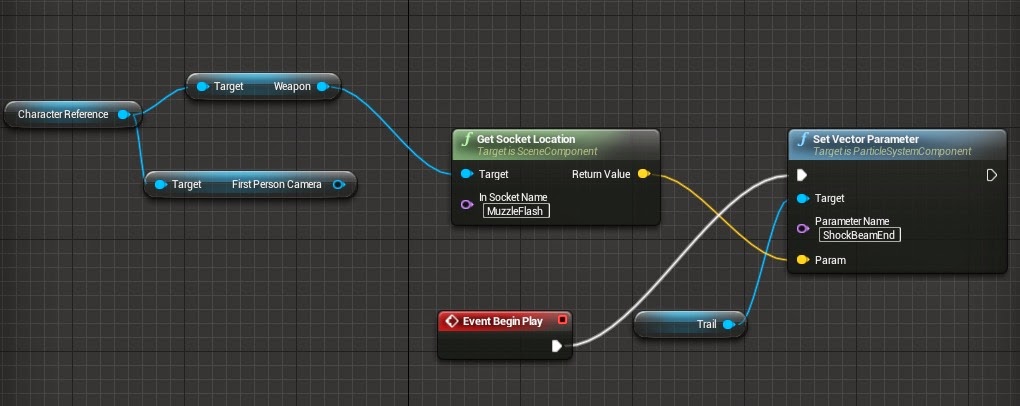
5. Create Post Begin Play event and SetVectorParameter to ParticleSystem Component that you have created (Trail),
4. Add Particle System component to Components of MyProjectile assing Template to P_AssoultRifle_Trail name it Trail,
5. Create Post Begin Play event and SetVectorParameter to ParticleSystem Component that you have created (Trail),
We are getting Character Reference from it we are taking Weapon reference and from Weapon we get socket location.
Thanks to that you will have nice trail effect when shooting.
6. Last thing is to change some parameters of Projectile.
- Projectile Gravity Scale - 0,
Thanks to that you will have nice trail effect when shooting.
6. Last thing is to change some parameters of Projectile.
- Projectile Gravity Scale - 0,
- Initial Speed and Max Speed - 10 000,
- Velocity X - 10000,
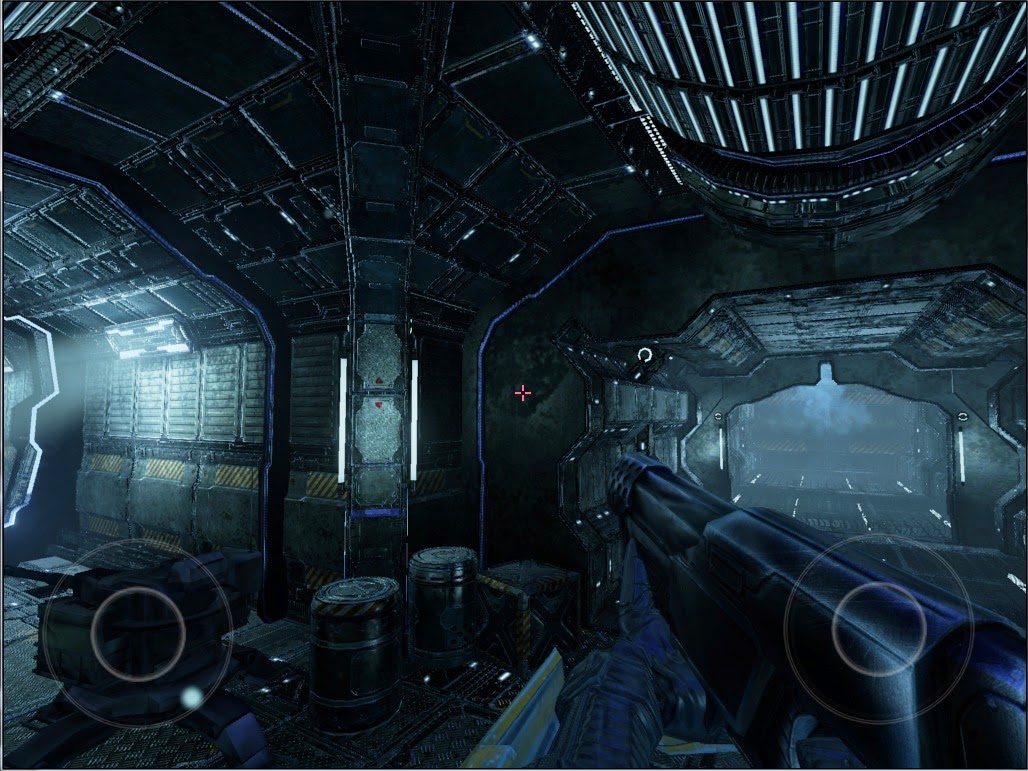
Your weapon is now functional! You can try with different settings for projectile, you can add muzzleflash effects or impact effects.
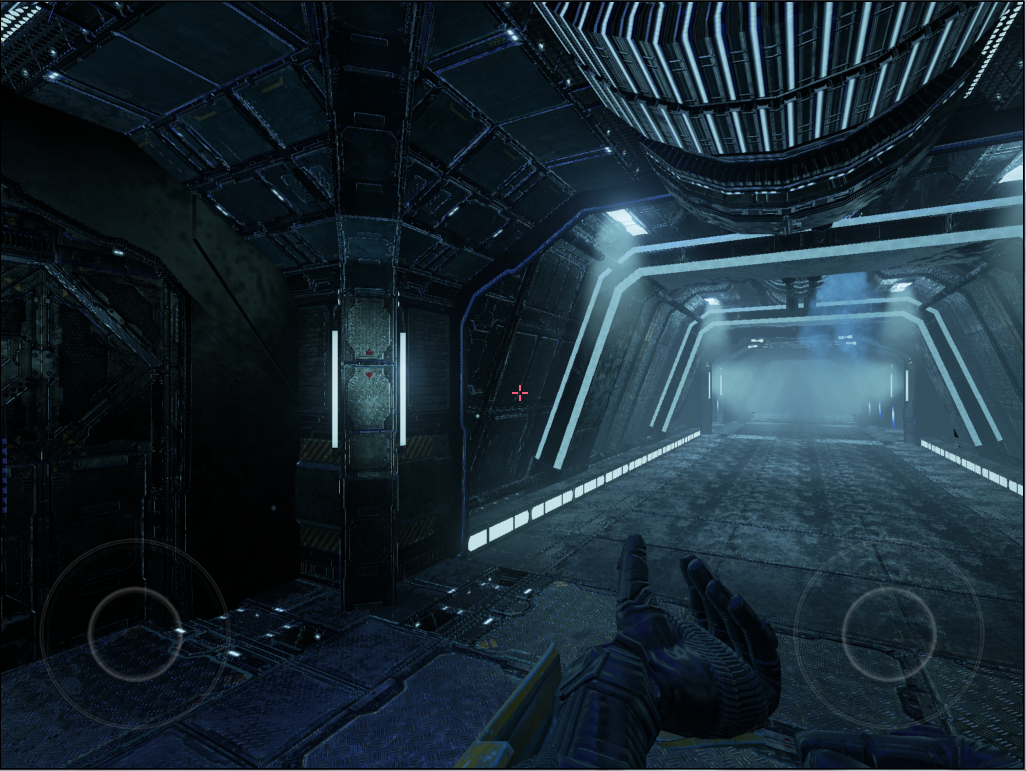
Here's how it looking now:
In next post we will be adding effects to this weapon. So it will feel like we are really shooting with it.
Here's how it looking now:
No comments:
Post a Comment